Tables
Use tables to display structured data in rows and columns. Follow the steps below to either copy an existing table or create a new one or use the table styler snippet.
Creating a New Table
Step 1:
Insert a table
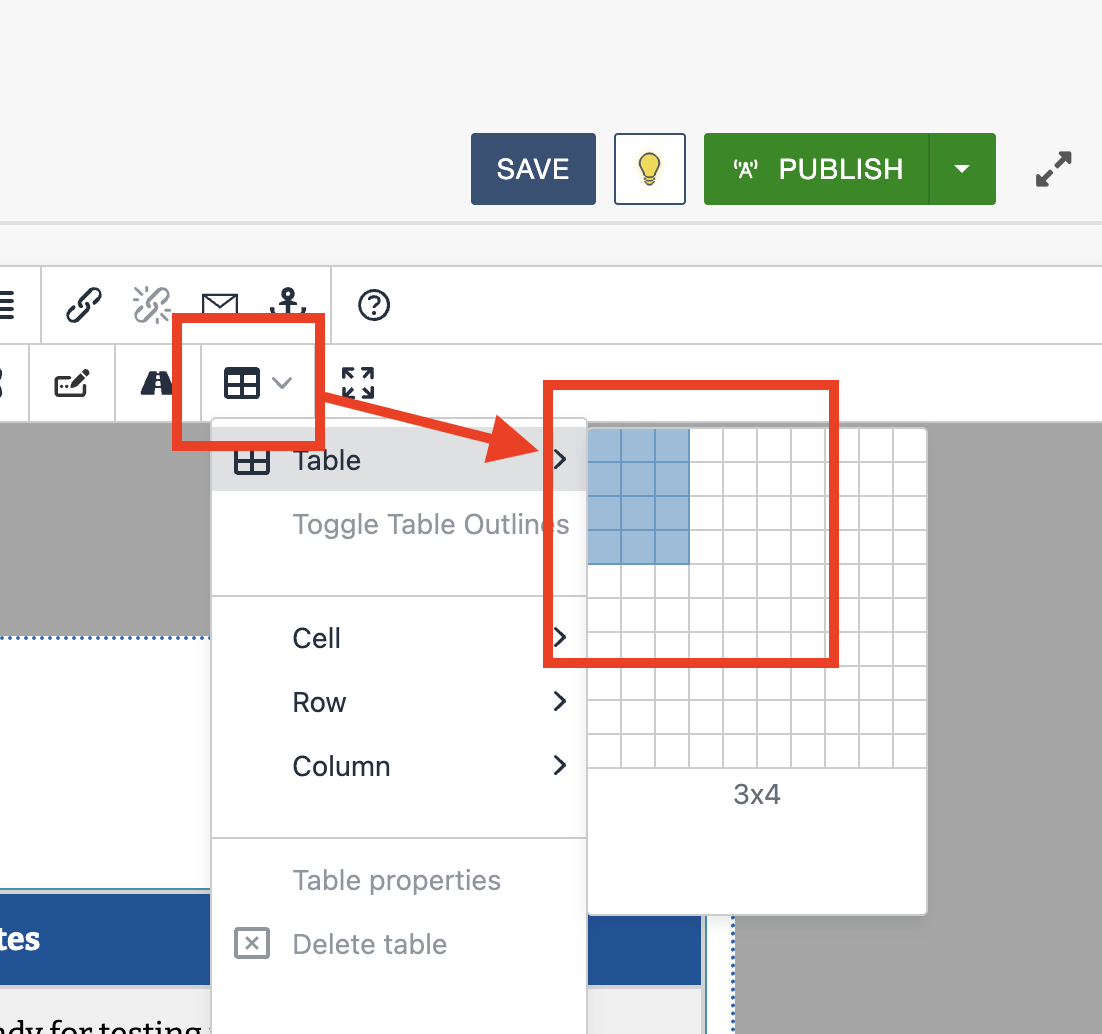
In the WYSIWYG toolbar, select the Table icon.
Choose Table and drag across the grid to select the number of rows and columns.
Step 2:
Add a header row
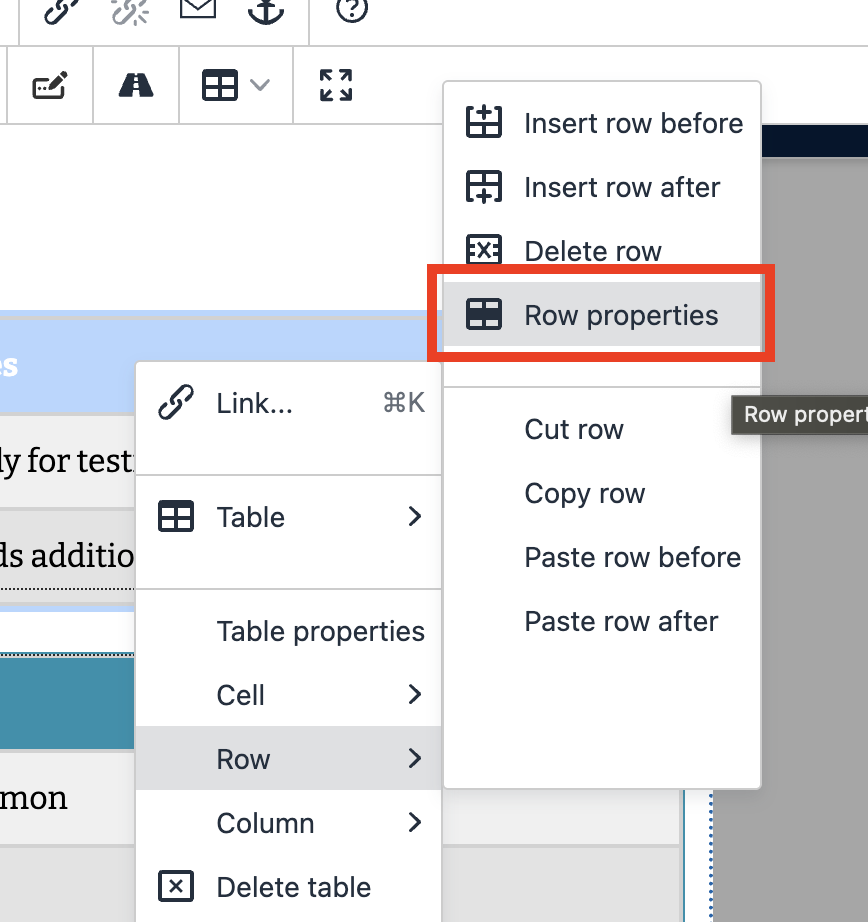
Highlight the first row.
Right-click and select Row > Row properties.
Set Row Type to Header.
Step 3:
Apply a table style
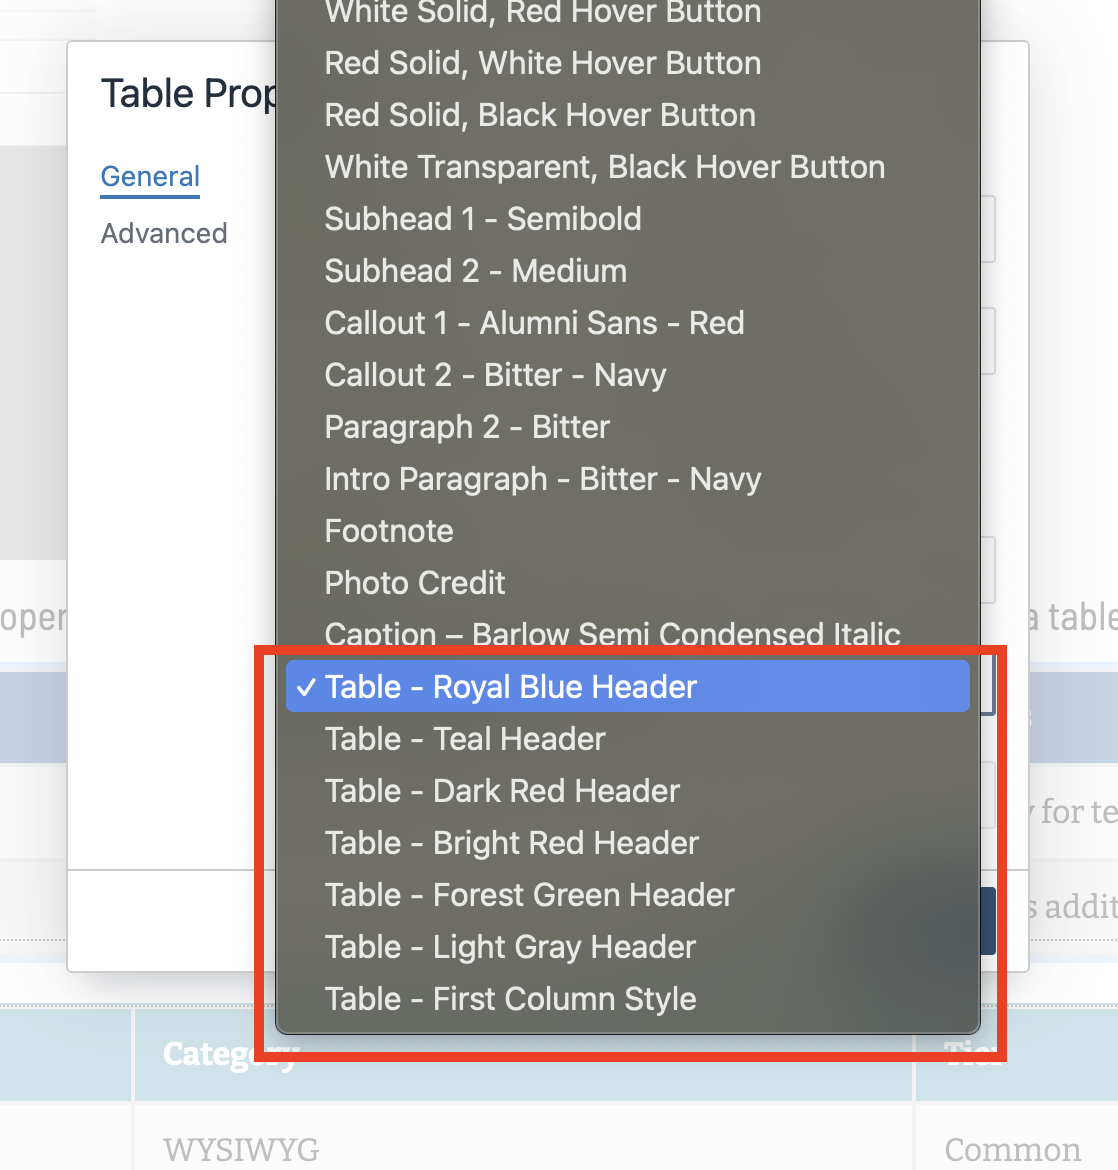
Right-click the table and select Table properties.
Choose a table class from the Class dropdown.
Copying an Existing Table
Step 1
Copy and paste the table into the WYSIWYG editor.
Step 2:
Clean the table code
Click the Source button and locate the <table> tag.
Remove any extra attributes so only a clean <table> tag remains.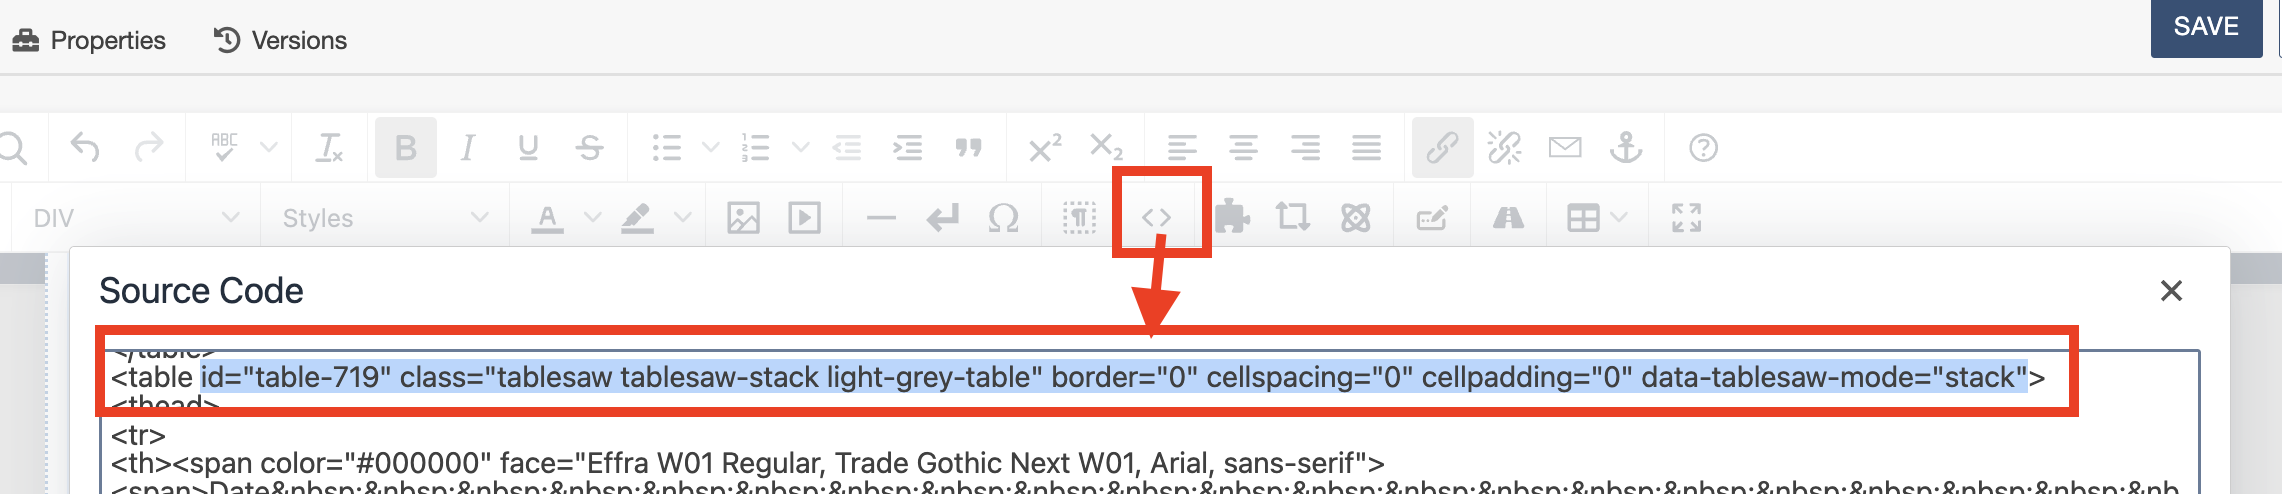
Step 3:
Apply a table style
Right-click the table and select Table properties.
In the Class dropdown, choose a table style.
Remove anything in the Custom Class field.
Tips
- Always use a header row for accessibility
- Choose a table style for consistent formatting
- Avoid pasting tables directly from Word without cleaning them
- Preview your table on mobile to ensure it displays correctly